
Creating a comfortable and stylish dining space that reflects personal character without costing a fortune can seem like a daunting task. However, a solution well within reach is an IKEA hack dining room makeover. This venture involves planning a design that suits your taste, assembling IKEA furniture and further customizing it to achieve the desired aesthetic. By evaluating your space effectively, understanding IKEA’s assembly process, and exploring various customization techniques, you can transform your dining room into your desired dream space. In the subsequent elaborations, the focus is on helping you efficiently undertake each phase of this beneficial project.
Planning and Designing
Article Title: Designing the Perfect Dining Room Makeover with IKEA’s Diverse Range
Introduction:
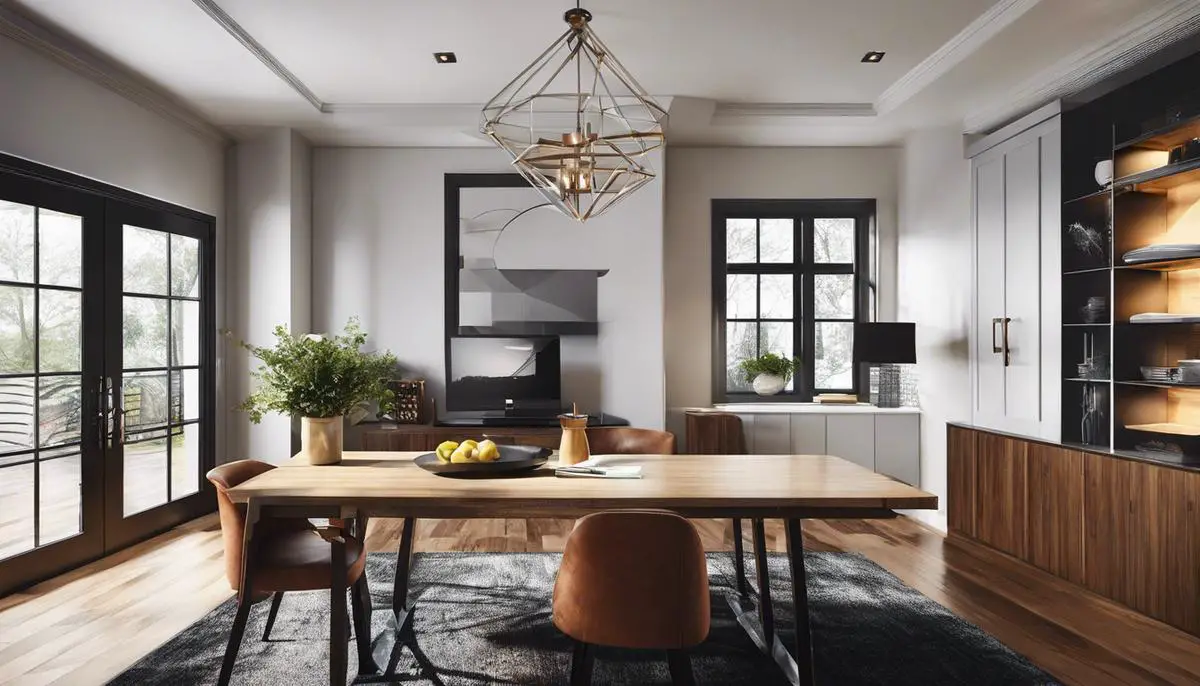
For any home design enthusiast, embarking on a dining room makeover can be an exciting venture. Whether it’s a fresh, contemporary design or a cozy and timeless appeal that you’re seeking, IKEA’s wide range of products could be your perfect solutions. Let’s delve into crafting an effective game plan for your dining room makeover, blending budget, aesthetic, and utility flawlessly with IKEA’s cutting-edge design concepts.
Step 1: Understanding Your Space:
Before launching into a buying spree, it’s essential to thoroughly comprehend the dimensions of the dining room in question. Measure the length, breadth, and other nooks or corners if any. Make a rough sketch of your room, ensuring it matches the measurements. This aids in choosing right-sized furniture later in the designing process.
Step 2: Determining Your Style:
Next, define the aesthetic you’re aiming for. If you’re a fan of sleek lines and minimalistic charm, opt for IKEA’s modern series like EKEDALEN or NORRÅKER. For classic elegance with a rustic touch, browse through traditional series like LERHAMN or INGATORP. Review different layouts online or in-store at IKEA to gain a clearer vision.
Step 3: Budgeting Accurately:
Always remember to set a preliminary budget for your makeover. IKEA’s price variety caters to different budget preferences, so this exercise will ensure you aren’t overwhelmed with choices when shopping. Keep in mind that the costliest product is not always the best for your needs.
Step 4: Selecting Furniture:
Start with the most prominent – the dining table. IKEA offers extendable tables, drop-leaf tables, and buffet tables. Depending on room size and family requirements, pick an appropriate option. Progress to dining chairs or benches that match your chosen aesthetics and comfort. A HEMNES storage combination or a LIATORP sideboard could be great additions to manage your crockery and other dining essentials.
Step 5: Lighting Choices:
Never undermine the impact of good lighting in a dining room. IKEA’s pendant lamps, like the HEKTAR or RANARP, can add a cozy, vintage charm to your space. For a modern touch, choose from their range of LED ceiling lamps.
Step 6: Personal Touches:
To truly make the space yours, sprinkle the room with personalized elements. From IKEA’s diversity of rugs, table runners to wall arts, you can find items that reflect your preferences.
Step 7: Practical Assessment:
Always consider the practical side of things. Ask yourself – is there enough room around the table for people to move comfortably? Are the chairs comfy for long dinner talks?
Tip: IKEA’s product descriptions and reviews provide great insight into the durability and comfort of their products which can aid in your selection process.
Remember, a dining room makeover isn’t about following trends; it’s about creating a space for your family and friends where they connect and enjoy good food and conversations. With proper planning, a pinch of imagination, and IKEA’s wide range – an exquisite dining room makeover is just a few steps away! And as always – enjoy the journey. Crafting a space you love is a wonderful adventure.

Assembling IKEA Furniture
The Art of Efficient IKEA Furniture Assembly: A Hobbyist’s Guide
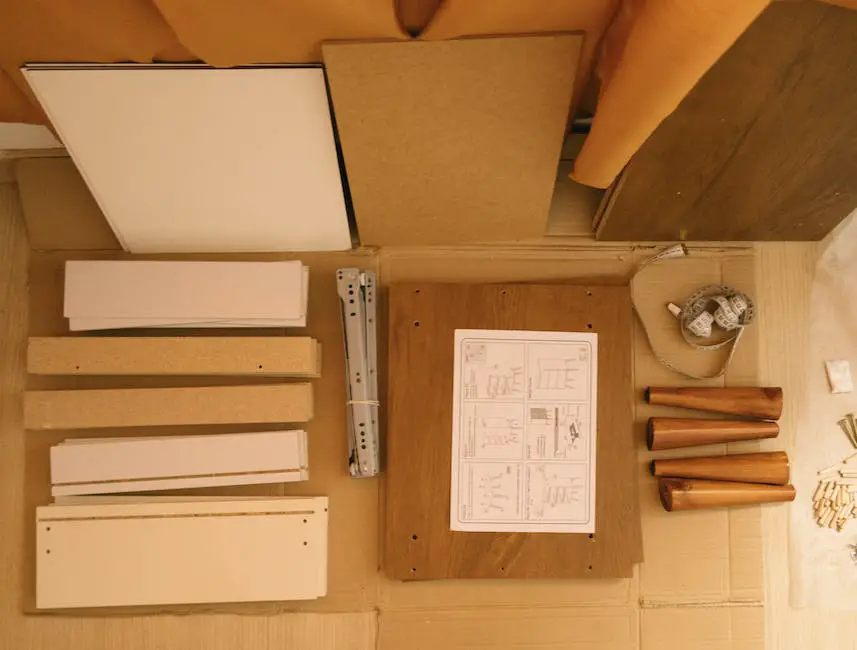
On the journey to transforming your space, a critical step remains – the assembly of your chosen IKEA furniture. Here the magic happens. Your magnificent flat-packed box evolves into your dream couch, table, or shelf. Let’s delve into the ways to effectively carry out this task with minimal fuss.
Begin with Preparation.
Before getting down to the actual assembly, some initial steps can make the process smoother. Read the manual thoroughly. Familiarize yourself with IKEA’s pictorial instructions to avoid any surprises down the line. Also prepare a clean, spacious area for assembly. This will allow you to lay out all the parts, keeping track of everything neatly.
Tool Up.
Ensure all the included tools and accessories are on hand before you start. If any are missing, contact IKEA customer service, and they’ll help you out. Investing in some additional tools like an electric drill can also speed things up considerably. Some IKEA enthusiasts swear by a rubber mallet for certain tighter connections as well!
Go at Your Pace.
Remember, furniture assembly is not a race. The goal is a sturdy piece that will last for years, not a quick assembly time. Respect the product and don’t rush. Take short breaks if needed, hydrate and ensure you remain focused for the task at hand.
Small Parts First.
When starting to assemble, focus on the smaller parts before beginning with the larger sections. This approach gives you a sense of progress and helps to reduce overwhelm.
Double-Check Always.
As you assemble, continue to refer back to the instructions. Make sure every part and screw is in its correct place. A common mistake is to discover you’ve inserted a part backwards halfway through the process. Double-checking along the way prevents such hiccups.
Invite a Friend.
For larger items like beds or wardrobes, having an extra pair of hands can make the assembly much easier. An assembly party with your confidante can turn an otherwise boring task into a fun catch-up session, and it always helps to have an extra set of eyes to ensure everything is in its right place.
The Last Piece.
Perhaps one of the most satisfying moments of assembling IKEA furniture is putting in the final piece. This is the culmination of your concentration, your patience, and your labor. Take a moment to appreciate the transformation from a flat pack of parts to a beautifully finished piece of furniture.
In the end, the crucial elements of effective IKEA furniture assembly are preparation, patience, the correct tools, and a meticulous eye for detail. With these in hand, you’ll find yourself a master of the art in no time, enjoying the fruits of your labor in a beautifully furnished room of your own making. Now, it’s time to sit back, relax, and enjoy your creation. Happy assembling!
Customizing IKEA Furniture
Personalizing Your IKEA Furniture
Adding a personal touch to your dining room often means going beyond selecting the right furniture. It involves adding elements and details that represent you, by personalizing your IKEA furniture. This endeavor doesn’t have to be daunting. Here are some doable ways to make your flat-pack furniture look and feel more like you.
Painting Your Furniture
Adding a couple of coats of paint can dramatically change the appearance of furniture. It isn’t only a way to add color, but also to create a specific mood in the dining area. Opt for bright shades or pastel colors for a vibrant look. A darker tone can create a more formal or intimate dining atmosphere.
Make sure to sand the furniture lightly before painting to help the paint adhere better. Use a good-quality paintbrush or roller to apply paint evenly. And don’t forget, let each coat dry off completely; only then apply the subsequent layer.
Upholstering Seats
Ready-assembled chairs from IKEA are perfect candidates for a bit of personalization. Look for high-quality, unique upholstery fabric that complements your dining room. You could match the fabric design or color with your curtains, rug, or other elements in the room for a cohesive look.
Remember to measure the chairs correctly before getting the fabric cut. After you have the right size, get some upholstery foam for extra comfort and secure the fabric using a staple gun.
Adding Decorative Hardware
Kick up the personalization notch with some unique hardware. Changing drawer pulls or handles not only adds visual interest but also makes your IKEA furniture stand out. Look for vintage or decorative hardware in home improvement stores for that exclusive look.
Stenciling
Another great way to make IKEA furniture your own is by adding stenciled designs. From geometric patterns to more intricate designs, stencils are easy to apply and can instantly elevate the look of your furniture.
Simply choose the stencil design you want, secure it firmly to the surface with painter’s tape and apply paint with a dense foam roller. Let it dry completely before removing the stencil.
Implementing these customization tips ensures that the IKEA furniture in your dining room aligns perfectly with your style. In the end, the most essential part: enjoy the process, as personalizing your furniture should be fun and rewarding!

Photo by nicolegeri on Unsplash
Mastering the art of an IKEA hack dining room makeover is undeniably a rewarding endeavor. Not only does it provide an opportunity to tap into your inner creativity, but it also allows for the creation of a dining space that exudes personal style and taste. Understanding the assembly process is integral in instilling confidence in your furniture building capabilities, while learning how to customize IKEA furniture, through painting, staining or adding new hardware, provides the chance to yield unforgettable, unique dining room features. Thus, embarking on this journey can lead to the development of not just a beautiful dining room, but also new skill sets.
