

Have you ever browsed through the IKEA catalog and stood amazed at the stylish but straightforward furniture it offers, only to wonder how you could put your unique spin on these items? You’re not alone in this creative endeavor! The world of ‘IKEA hacks’ opens up a realm of possibilities to customize your furniture and breathe a new life into your outdoor space. This guide takes you on an informative journey, starting with understanding the simplicity behind IKEA’s flat-pack design and assembly methods. While delving into the realms of DIY tools and supplies, you’ll become versed with essentials like saws, drills, paint, and varnishes. Further, we’ll delve into how to plan and execute an IKEA hack strategically for your outdoor furniture, peppered with wise advice on making safe alterations and post-modification assembly.
Understanding IKEA Furniture Assembly
When it comes to assembling IKEA furniture, it definitely doesn’t have to be a daunting task that fills one with sweat and trepidation. Though IKEA’s minimalist, Swedish design ethos often translates to “no words, just pictures” method of instructions, they can be mastered with some patience and a cool head. Here’s the wealth of knowledge needed for this endeavor.
The first step for confident assembly involves understanding what’s in the box. IKEA thoroughly packs their flat-packed furniture with every widget, screw, and piece of wood needed. Spread everything out on a clean, flat surface to visually locate all the bits and pieces. A pro tip to remember is to not dispose of the packaging material until the furniture is completely put together. You never know what tiny crucial part might be hidden there!
IKEA instructions are notoriously text-light. They’re an international company, and having instructions in pictures rather than words simplifies things. Though it can seem confusing at first glance, taking the time to carefully observe the diagrams can help decode what they’re trying to convey. The instructions usually emphasize the right technique for putting things together.
IKEA uses a series of standardized screws and connectors in most of their furniture. It’s really valuable to familiarize oneself with their hardware. If you’ve put together one piece of IKEA furniture, chances are, you’ve got a good foundation for the rest! And don’t worry about having extra bits at the end – IKEA traditionally provides more than necessary.
One mustn’t underestimate the importance of using the right tools. IKEA typically includes a basic set of tools necessary for assembly, such as an Allen wrench. But, having a few extras like a Phillips screwdriver or a small hammer can potentially make the process smoother and more efficient.
Order of operations matters a lot when it comes to IKEA furniture. Unlike other DIY tasks where one might be able to skip ahead or do things in a different order, IKEA furniture tends to be made in such a way that things need to be done in a certain sequence. Even if it doesn’t seem to make sense, follow the instructions exactly as set out.
Undoubtedly, patience works like a charm. IKEA assembly isn’t usually a quick process. It’s worth taking breaks if needed, and not rushing the task. And when it seems that the piece of furniture isn’t going to come together, step back, take a deep breath, and just reassess the situation.
Finally, if all fails, there are tons of wonderful resources available online, including assembly videos and forums dedicated to IKEA assembly hacks. IKEA’s own customer service can also be a good resource for tricky assembly issues.
Voila! The enlightenment on assembling IKEA furniture is all laid out. It’s a task that can be definitely conquered with a calm mind, a good understanding of the process, and a handful of patience. Happy DIY-ing!
Exploring DIY Tools and Supplies
Taking on a DIY IKEA furniture hack is like embarking on a journey of customization, creativity, and personal expression. Armed with the basic framework provided by IKEA, it’s possible to create something truly unique and tailored to your personal style. Here’s a list of the essential tools and supplies you will need to make your IKEA hack a success.
- A Preconceived Plan & Goal: First and foremost for any IKEA hack is having an idea of what you want the end result to look like. This doesn’t necessarily mean you need a fully fleshed out blueprint or drawing, but a basic concept of your goal will keep your project focused and productive.
- Power Drill: Given the nature of IKEA furniture construction, a power drill can be a highly useful tool. Driving in screws takes less physical effort than using a manual screwdriver and it’s much quicker too. Some IKEA hacks may require additional holes, adjustments to existing holes, or even attaching new elements to the furniture, all tasks made easier with a power drill.
- Sandpaper: This is a must-have, especially if painting or staining is a part of your IKEA hack. Sandpaper is used to prepare the surface of your furniture for paint or stain by creating tiny grooves for the substance to adhere to.
- Measuring Tape: When adding to or modifying furniture pieces, precise measurements are key. A sturdy, reliable measuring tape will ensure that all of your elements fit together as envisioned.
- Paint or Stain: To truly make your IKEA furniture piece your own, consider applying a fresh coat of paint or stain. Depending on the finish of the original product, you may want to purchase a specific type of paint or stain to achieve the best results.
- Saw (Jigsaw, Circular Saw, Miter Saw, etc.): Depending on the nature of your IKEA furniture hack, a saw may be required. Whether you are shortening elements, creating new pieces, or even adding intricate designs, having a reliable saw will make all the difference.
- Additional Fittings and/or Hardware: Modifications to furniture often mean additional or unique hardware is needed. This can range from screws, brackets, nails, hinges, to dowels, knobs, and handles.
- L-Brackets / Corner Braces: These can be extremely useful for reinforcing furniture segments or attaching new elements. They provide a way to securely join pieces together while also adding stability.
- Duct Tape / Painters Tape: Both of these types of tape can be useful in a furniture hack. Duct tape can act as a quick clamp or brace during assembly, while painters tape will help you achieve clean, crisp lines when applying paint or stain.
- Protective Gear: This encompasses safety glasses and gloves for when you are sawing, drilling, or otherwise modifying the furniture. It’s not just about the final product. Your safety and well-being during the hacking process matter immensely too.
There you have it. With these tools and supplies, plus a heaping dose of creativity and determination, you’re well on your way to transforming an ordinary IKEA item into a one-of-a-kind treasure. Time to roll up those sleeves, and let the IKEA hacking begin!

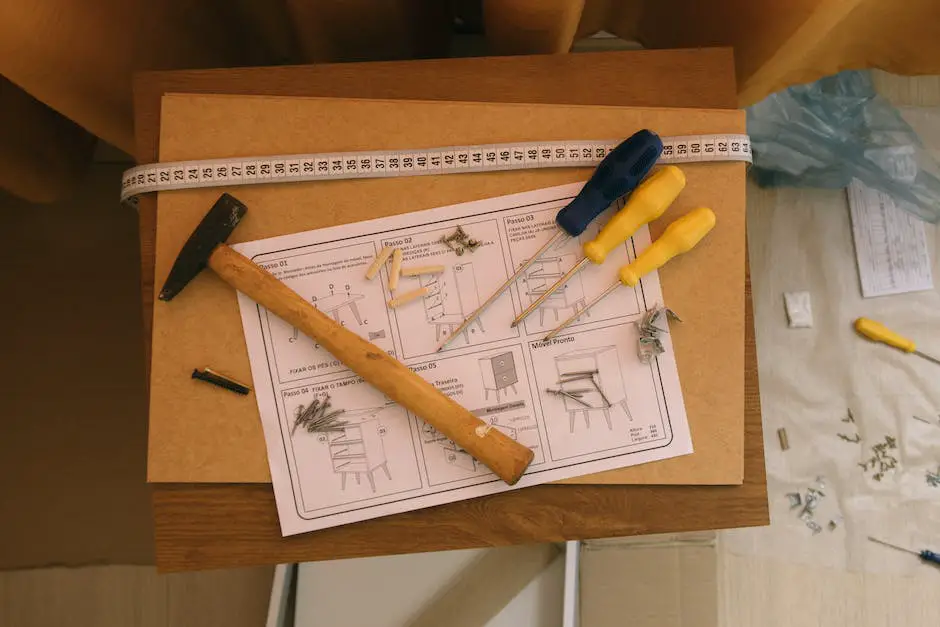
Photo by rakhmatsuwandi on Unsplash
Planning and Executing an IKEA Hack
Now that we’ve tackled the basics of decoding IKEA’s minimalist, almost cryptic instructions and the all-important process of assembling your chosen piece, let’s delve straight into the thrilling world of IKEA hacking to transform standard indoor pieces into enviable outdoor furniture.
Once you’ve got a clear plan and goal in mind, it’s time to gather your materials. Your power drill will be essential in many hacks, as it opens the possibility of changing the structure of the piece, like drilling extra holes or adding elements. Make sure to have a variety of drill bits to accommodate for different needs.
You might dismiss sandpaper as a trivial part of an IKEA Hack, but it’s fundamental. It preps the surface of the material, ensuring an effective adhesion of the paint or stain you’ll apply later. When choosing your sandpaper, remember that a lower grit number will provide a coarse texture and is better for stripping off old paint, while a higher number gives a finer finish, best for the final touches before painting or staining.
A good quality measuring tape is indispensable in an IKEA Hack. It ensures precision, symmetry, and that all your modifications fit just right. A hack carried out with accuracy and calculated measurements will look less like a DIY project and more like an artisan piece.
Paints or stains are where the magic truly happens! These not only enhance your IKEA piece visually, but also provide a protective layer against weather, especially crucial for outdoor furniture. Consider your outdoor color palette and select your paint or stain accordingly.
When it comes to saws, each type serves a specific purpose. For example, a jigsaw is excellent for making curved or complex cuts, and a circular saw is ideal for straight, precise cuts. A miter saw, on the other hand, is perfect for making angled cuts.
Additional hardware like bolts, nuts, and screws, can be invaluable when it comes to adding stability to your IKEA piece. Different modifications require different types of hardware, so keep a variety on hand.
L-Brackets or Corner Braces add extra beef to your project. They help in attaching shelves, merging pieces, or making the structure more solid while ensuring the joints are square and secure.
Duct tape and painters tape may seem like hack no-brainers, but the latter is especially crucial when painting or staining. It helps create those crisp, even lines that professional look we all aim for. On the other hand, duct tape can offer temporary stability during modifications until everything is securely fastened.
Last but not least, don’t forget your protective gear. Safety glasses, a dust mask, and working gloves always come in handy when sawing, drilling, and painting. Remember, safety first, even with an IKEA Hack.
With these insights at your fingertips, you’re now equipped to conquer any IKEA Hack for outdoor furniture. Happy Hacking!

Unleashing your creativity on IKEA’s sturdy and stylish furniture, you have now ventured into the inspiring process of transforming standard pieces into a uniqely personalized outdoor setup. You’ve grasped the basics of IKEA’s assembly methods and have a clear understanding of the DIY tools and supplies available. More importantly, you’re now equipped with the knowledge to safely plan, modify, and reassemble IKEA furniture. Diving into the world of IKEA hacks truly has the potential to revolutionize your outdoor living space, making it a worthwhile venture for all DIY enthusiasts. It’s time to put this newfound knowledge to use – Start brainstorming, create transformation blueprints, and look forward to lounging in an outdoor sanctuary that truly reflects your style and personality.
